
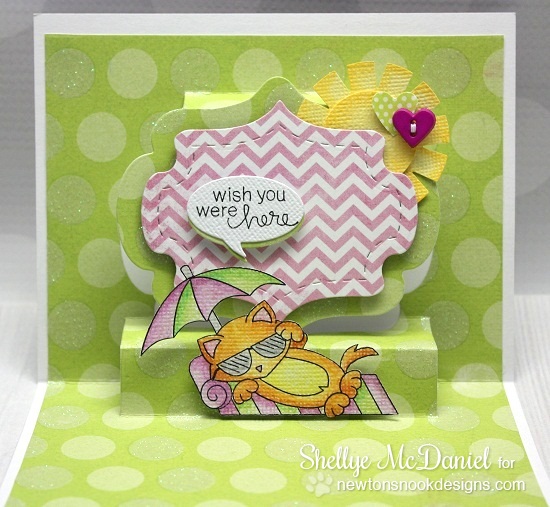
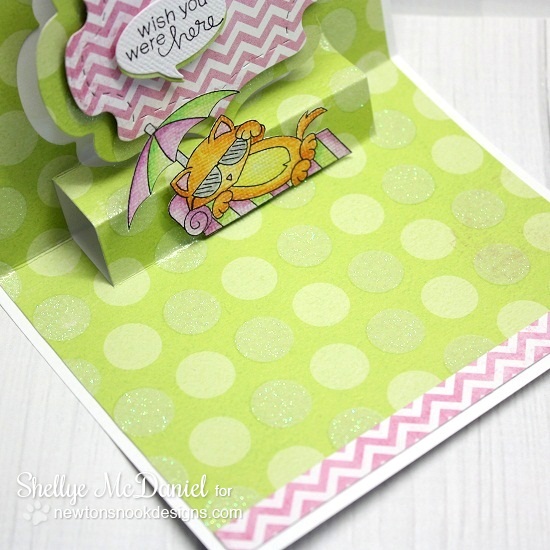
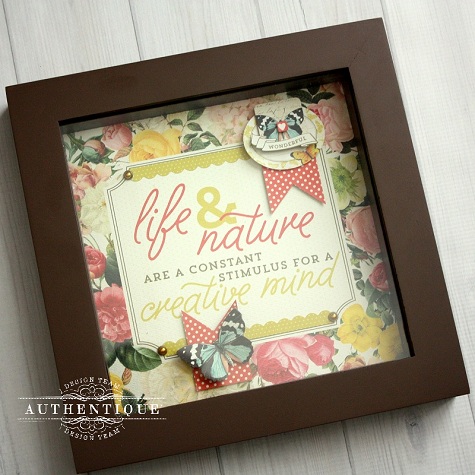
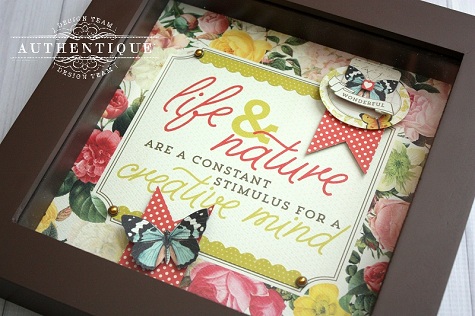
Don't trash it, treasure it!
I'm up today at
AUTHENTIQUE PAPER
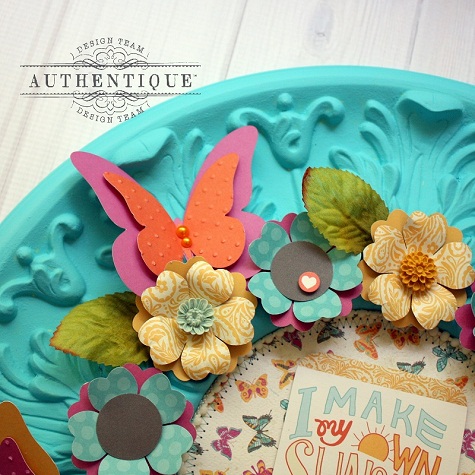
with an altered ceiling medallion that once hung around a light fixture.
My sweet hubby brought this home to me all dirty and bright yellow...
but I was excited at the challenge to alter it nonetheless :)
blog.authentiquepaper.com
AUTHENTIQUE PAPER
with an altered ceiling medallion that once hung around a light fixture.
My sweet hubby brought this home to me all dirty and bright yellow...
but I was excited at the challenge to alter it nonetheless :)
blog.authentiquepaper.com
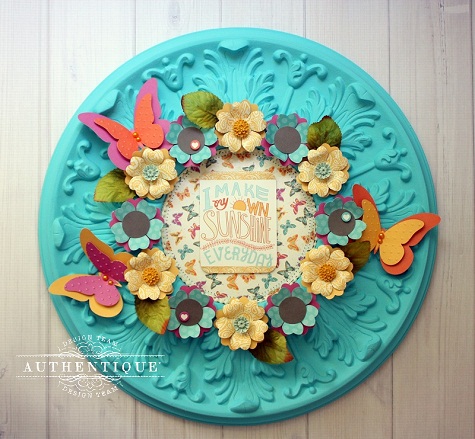
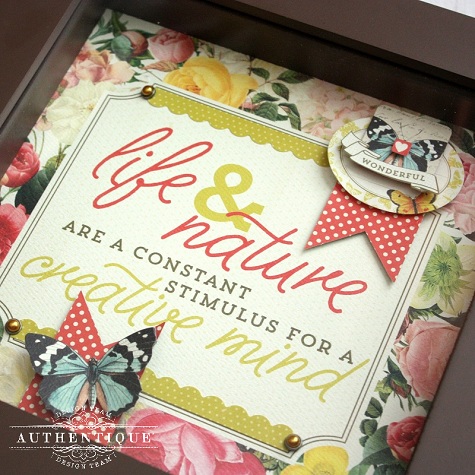
After washing away the grime, I decided to give it a coat of turquoise paint.
Because it was painted bright yellow, I gave it a covering with gesso (or use any primer)
first and then painted with a sponge brush and plain 'ole Plaid paint.
Because it was painted bright yellow, I gave it a covering with gesso (or use any primer)
first and then painted with a sponge brush and plain 'ole Plaid paint.
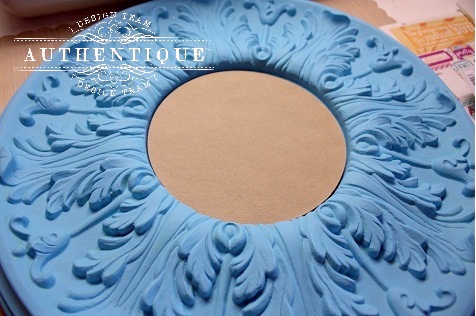
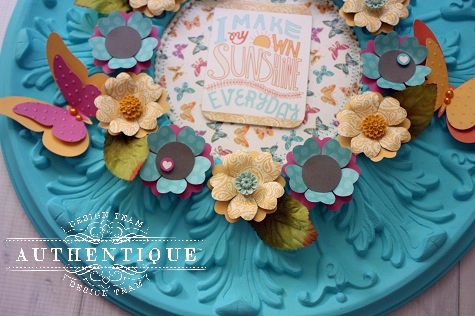
The opening at the center is roughly 6" in diameter and I knew that I wanted to
add some sort of sentiment to it with a cluster of flowers around the opening.
A 6" piece of chipboard fits perfectly inside, so I used it as the base for adding
the patterned paper and journal card to.
add some sort of sentiment to it with a cluster of flowers around the opening.
A 6" piece of chipboard fits perfectly inside, so I used it as the base for adding
the patterned paper and journal card to.
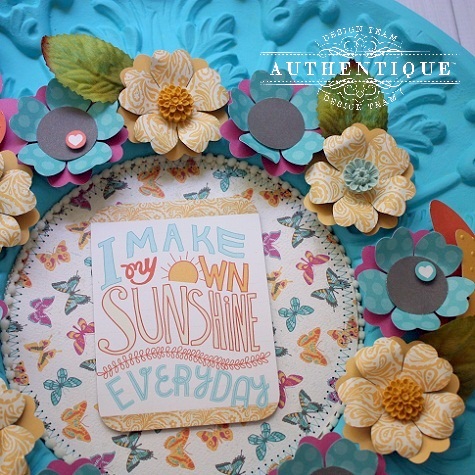
Before securing the chipboard center into place, I machine stitched around the
edge and also trimmed it in an off-white pom pom trim.
edge and also trimmed it in an off-white pom pom trim.
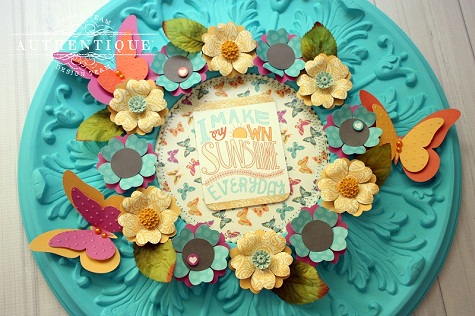
The blooms of flowers were simply a compilation of Radiant's 6X6 paper
and flower punch by McGill. I punched several patterns of the same flower shape
and gave them shape by using a stylus and molding pad.
and flower punch by McGill. I punched several patterns of the same flower shape
and gave them shape by using a stylus and molding pad.
Some of the flowers' petals are rolled downward (yellow) and the blue flowers
were molded at the center so that the petals lifted upward. I stacked various pieces
together with foam adhesive and then secured around the opening of the ceiling tile.
were molded at the center so that the petals lifted upward. I stacked various pieces
together with foam adhesive and then secured around the opening of the ceiling tile.
I used the basic butterfly shape found in my electronic die-cutting files and cut a large
and small piece from 6X6 sheets of Radiant paper. Before layering together, I
embossed the smaller shapes with a polka dot pattern.
And every flower needs a petal! I found these in my stash from Petaloo...they
look awesome tucked in amongst the blooms and gave the project a totally different look!
Authenitque Products: Radiant Collection- Whimsical Paper; Details
12X12 Cardstock Stickers; 6X6 Paper Bundle; Life Cards
12X12 Cardstock Stickers; 6X6 Paper Bundle; Life Cards
Other: May Arts- Pom Pom Trim; Petaloo- Leaves
Happy to see you today!
Happy to see you today!


