
FIND MY VIDEO TUTORIALS ON YOUTUBE

MAY ARTS ROUND #2 SUBMISSION
MAY ARTS ROUND #2 SUBMISSION
by Shellye McDaniel
Welcome to my project for the second round of the May Arts Design Team Call!
I must say that I'm so very excited with how my sweet little project came together...
it turned out to be even cuter in person than it was in my head :)
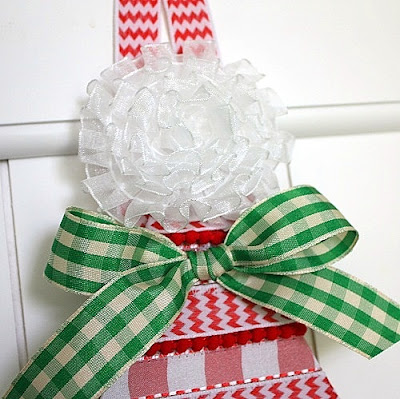
MR. SANTAMAN WALL or DOOR HANGING


Now isn't he the cutest! I have compiled several step-by-step photos below to go along with the tutorial.
MAY ARTS SUPPLY LIST
MAY ARTS SUPPLY LIST
- 1.5 Yards Woven Chevron Stripes/Wired- White 443-58-01
- 1 Yard Woven Chevron Stripes/Wired- Red 443-58-14
- 1 Yard Mini Pom Poms- White 419-01
- 1 Yard Mini Pom Poms- Red 419-14
- 1 Yard Squares-Stitch- Red/White AB14
- 1 Yard Sheer Box Pleat- White 392-58-01
- 1/2 Yard Solid/Ivory Check- Green AKB15
OTHER SUPPLIES
- 2- 9" Banner Chipboard Pieces (www.scrapbookersemporium.com)
- 2- 7" Scalloped Chipboard Pieces (www.scrapbookersemporium.com)
- 1- 6" Circle Chipboard Piece (www.scrapbookersemporium.com)
- 1 Sheet Champagne Felt
- 1 Sheet White Felt
- 1 Sheet Pink Felt
- 1 Cotton Ball
- 2 Small Black Adhesive Pearls (eyes)
- 1 Small Chipboard Red Heart (mouth)
- 3- 12X12 Sheets White Cardstock
- 1- 12X12 Sheet Red Cardstock
- Misc- desired embellishments, fabric glue, needle & thread, high-tack adhesive tape, no-fray solution and foam dots or foam tape; quick-dry craft glue
- Optional- sewing machine; Circle Dies (Die-Namics Circle Stax); Sizzix or die-cutting machine
(click on photos to enlarge as needed)

For both pieces of chipboard, trace the shape onto the sheets of white cardstock; cut out.
Adhere each cardstock to its chipboard mate; machine stitch around perimeter (if desired).

Trace the 6" round circle onto both the Champagne felt and white cardstock; cut out.
Adhere the cardstock circle only to one side of the chipboard circle.
Adhere the cardstock circle only to one side of the chipboard circle.
Set the chipboard circle aside for now...**do not adhere felt**

Using a 1.75" Circle Die & Sizzix, cut two pink felt circles for the cheeks.
If you do not have these tools available you may use pre-cut felt pieces or a
similar-sized circle as a template.
Attach cheeks approximately 1" from the bottom of the champagne felt;
machine stitch in place if desired. Next, using a thin coating of fabric glue, adhere
champagne felt to the round chipboard shape; machine stitch around perimeter.
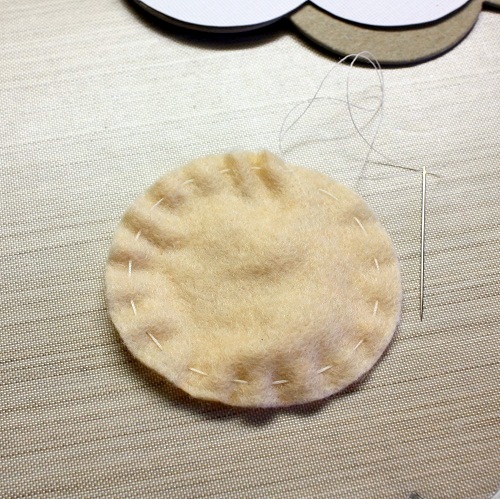
For the nose: cut a 2.5" circle from champagne felt.
Using a needle and thread, stitch a straight-running stitch around the edge
of the felt as shown above.
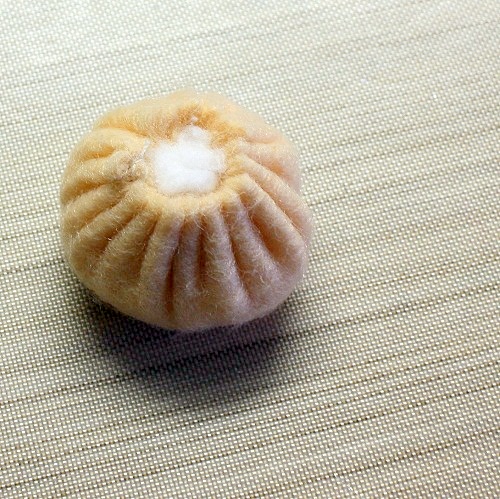
Place a single cotton ball in the center of the felt. Gently pull the thread into
a gather around the cotton ball; knot-off the thread and cut.
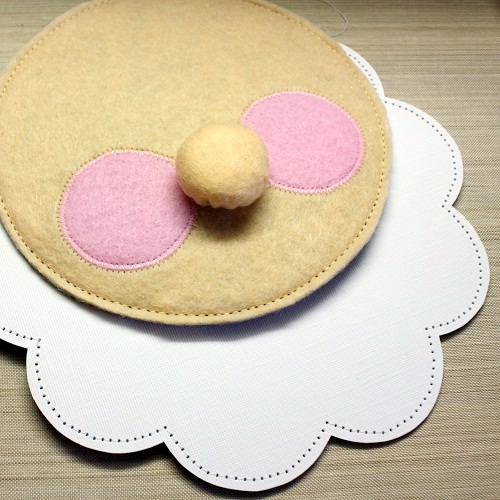
Coat the bottom of the 'nose' with fabric glue and place between the cheeks.
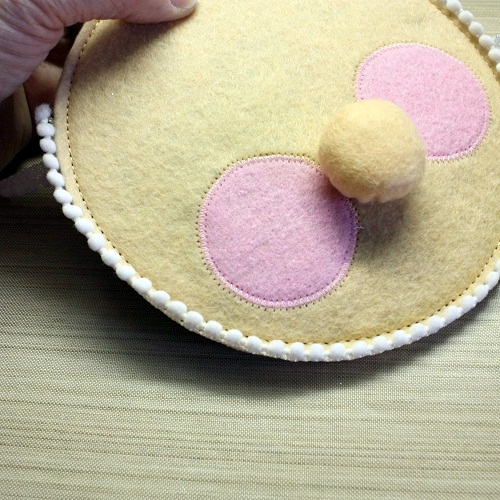
For the face: using fabric glue and the white pom pom trim, attach to the back edge
of the circle chipboard piece (Santa's face) as shown above.
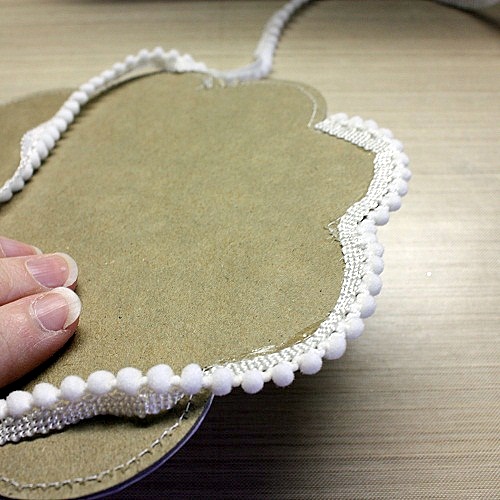
For the beard: trim the edge of one of the scalloped chipboard pieces in
the same fashion (as the face); just follow the natural curves of the chipboard.

This is how the cute pom-pom trim will look from the front-view!
At this point you can now adhere the face to the beard.
Using a quick-dry craft glue, attach the 'face' so that it's centered and
approximately 2.5-3" from the bottom of the scalloped beard (refer to completed photos above).
Next, glue the second piece of scalloped chipboard to the back, being sure to
match up the scalloped pattern.
Using a quick-dry craft glue, attach the 'face' so that it's centered and
approximately 2.5-3" from the bottom of the scalloped beard (refer to completed photos above).
Next, glue the second piece of scalloped chipboard to the back, being sure to
match up the scalloped pattern.

For the mustache: take a length of the White Woven Chevron Stripes/Wired ribbon.
Loop the end under as shown above. Build your remaining loops to the back so that
the ends will be hidden.

Loop ribbon three more times...you will have three loops at each end.
Total width across the span of the loops is approximately 4".

Using white thread and needle, make a stitch through the center of the
ribbon cluster; repeat this a few times and then tie off and cut thread.
Adhere just below the nose with fabric glue.
Below your mustache you may wish to add a small red heart for the mouth.
For the eyes, add two small black adhesive pearls (or use chenille pom poms or buttons).
Santa's 'face' is now complete! Next up is his hat...
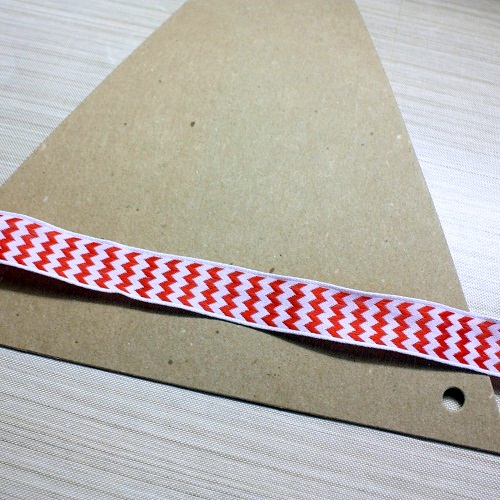
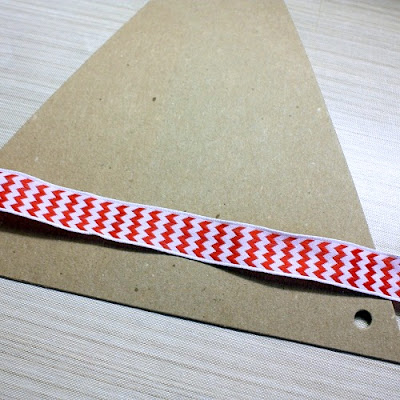 For the hat: Starting with the widest end of the banner chipboard piece, measure
and cut a length of the red/white Woven Chevron/Stripes Wired Ribbon.
Be sure to leave an excess of approximately 1/2" at each side so that
it can be wrapped around the chipboard.
Note: I have left a 1/2" gap between the bottom of the chipboard and
the start of the ribbon; this is where the white ribbon will be placed later.
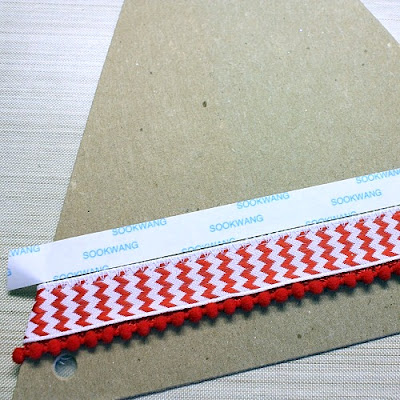
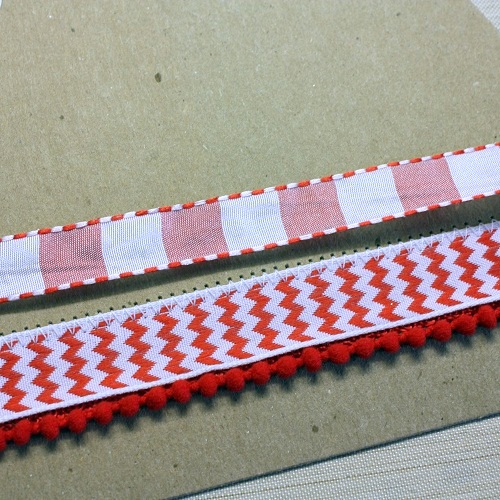
 To the bottom of the red/white Woven Chevron Stripes/Wired ribbon, glue
on the red mini pom poms trim. Adhere the length of ribbon to the chipboard
with a double-sided high-tack adhesive tape. Machine stitch at the top if desired.
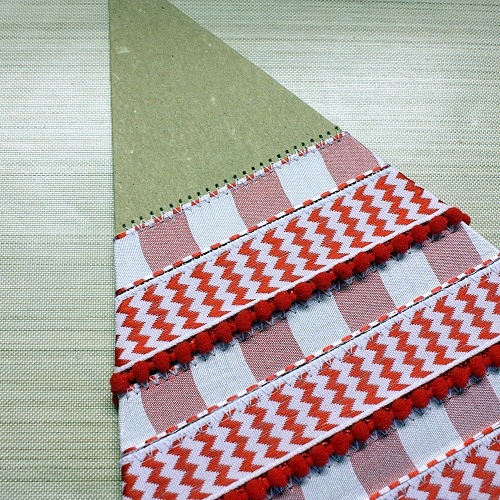
 Just above the stitching marks, add the red/white Squares-Stitch ribbon using
a double-sided high tack adhesive tape.
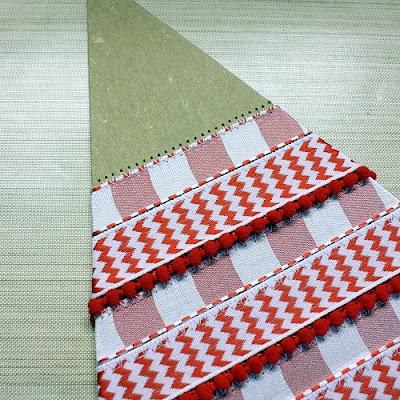 Repeat in the same fashion until the entire chipboard piece has been covered.
 For the hat top: From the white felt, cut a 2" circle.
Cover the felt with a generous amount of fabric glue. Beginning at the edge (as shown above)
wind the white Sheer Box Pleat trim onto the entire circle.
Adhere to the top of the completed pennant with fabric glue (as shown below)
For the hanger: To the top back portion of the completed Santa's Hat,
add a looped piece of the red/white Woven Chevron Striped/Wired ribbon.
Glue in place with fabric glue. The length of your ribbon will
depend upon how far you'd like for it to hang (I used 12" and folded in half)

 Here you can see how I've folded over the edges of the ribbon from the front.
Now just randomly apply foam dots (or foam tape) as shown above.
 Next, take the second piece of pennant chipboard and trace the shape
onto the 12X12 sheet of red cardstock. Cut out the shape and adhere to
the chipboard. Machine stitch around the perimeter if you'd like
(this just gives a nice finishing touch to the back of your project as well).
Adhere the piece to the foam dots.
How to tie a pretty bow?
And lastly we have come to the pretty green and ivory ribbon bow that
gives a pop of extra color to Mr. Santaman's hat!
When teaching classes, attending a dance recital or even working in the nursery at work,
I always get asked to 'make bows!' I have a couple of different methods, but when
working with free ribbon (as in not all ready attached to something, i.e. shoelaces)
this is my preferred method.
And yes even I have to start and restart to get my loops
just right so do not get discouraged if you have to try this a few times to get it the way you like :)
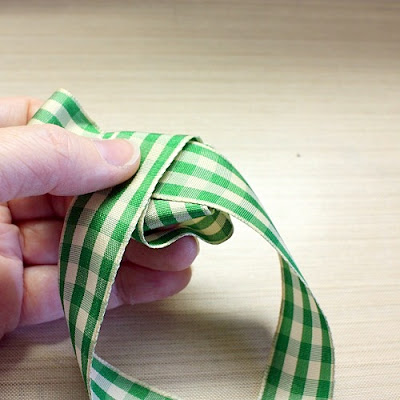
 Using a generous length of Green Solid/Ivory Check Ribbon (at least 18"),
make two bunny ears as shown above (loops are approximately 3").
Leave about a 2" space of ribbon between your loops
 Next, take the left loop and cross it in front of the right loop as shown above.
 Take that same left loop and bring it around through the back of the hole at the center
After you have pulled a bit of that left loop through the hole, take the tail (that's under
my thumb) and flip it up to the top (go North with it).
 (see that tail laying at the top? that's the tail mentioned above).
Next is the step that tends to confuse: finish pulling the left loop
through. With the left loop in your left hand the the right loop in the right hand,
turn the bow as you would a page in a flip-up style book or wall calendar.
If that doesn't help, think of the loops before as if they were face down;
now just turn them right-side up and facing you.
 Once you have made the correct flip, your bow should look like this.
Adjust the tension to make the center knot or loops as you'd like.
After cutting my ribbon ends I like to dab on a no-fray solution to ensure that
my pretty bow doesn't start to unravel :)
That's all for my Mr. Santaman tutorial! Please let me know if you have any questions.
and cut a length of the red/white Woven Chevron/Stripes Wired Ribbon.
Be sure to leave an excess of approximately 1/2" at each side so that
it can be wrapped around the chipboard.
Note: I have left a 1/2" gap between the bottom of the chipboard and
the start of the ribbon; this is where the white ribbon will be placed later.
on the red mini pom poms trim. Adhere the length of ribbon to the chipboard
with a double-sided high-tack adhesive tape. Machine stitch at the top if desired.

a double-sided high tack adhesive tape.

Cover the felt with a generous amount of fabric glue. Beginning at the edge (as shown above)
wind the white Sheer Box Pleat trim onto the entire circle.
Adhere to the top of the completed pennant with fabric glue (as shown below)

For the hanger: To the top back portion of the completed Santa's Hat,
add a looped piece of the red/white Woven Chevron Striped/Wired ribbon.
Glue in place with fabric glue. The length of your ribbon will
depend upon how far you'd like for it to hang (I used 12" and folded in half)


Now just randomly apply foam dots (or foam tape) as shown above.

onto the 12X12 sheet of red cardstock. Cut out the shape and adhere to
the chipboard. Machine stitch around the perimeter if you'd like
(this just gives a nice finishing touch to the back of your project as well).
Adhere the piece to the foam dots.
How to tie a pretty bow?
And lastly we have come to the pretty green and ivory ribbon bow that
gives a pop of extra color to Mr. Santaman's hat!
When teaching classes, attending a dance recital or even working in the nursery at work,
I always get asked to 'make bows!' I have a couple of different methods, but when
working with free ribbon (as in not all ready attached to something, i.e. shoelaces)
this is my preferred method.
And yes even I have to start and restart to get my loops
just right so do not get discouraged if you have to try this a few times to get it the way you like :)

make two bunny ears as shown above (loops are approximately 3").
Leave about a 2" space of ribbon between your loops


After you have pulled a bit of that left loop through the hole, take the tail (that's under
my thumb) and flip it up to the top (go North with it).

Next is the step that tends to confuse: finish pulling the left loop
through. With the left loop in your left hand the the right loop in the right hand,
turn the bow as you would a page in a flip-up style book or wall calendar.
If that doesn't help, think of the loops before as if they were face down;
now just turn them right-side up and facing you.

Adjust the tension to make the center knot or loops as you'd like.
After cutting my ribbon ends I like to dab on a no-fray solution to ensure that
my pretty bow doesn't start to unravel :)
That's all for my Mr. Santaman tutorial! Please let me know if you have any questions.


This is crazy fabulous! Wow! Just WOW!
ReplyDeleteThanks so much, Tegan :D
ReplyDeleteShellye this is absolutely amazing and so much work invovled. Fabulous project!
ReplyDeleteBeautiful...
ReplyDeleteAh! Lovely creation! Thank you for sharing! I included in a round up on today's blog article! http://lanettascreations.blogspot.com/2013/09/christmas-sewing.html#.UjQvycasiSo
ReplyDelete